


Our tech team has launched updates to The Nest today. As a result of these updates, members of the Nest Community will need to change their password in order to continue participating in the community. In addition, The Nest community member's avatars will be replaced with generic default avatars. If you wish to revert to your original avatar, you will need to re-upload it via The Nest.
If you have questions about this, please email help@theknot.com.
Thank you.
Note: This only affects The Nest's community members and will not affect members on The Bump or The Knot.
How we start seeds
It looks like lots of people, including us, are starting our seeds this week. Here is what we do.
We did not have good results with the biodegradeable seed pots, also called Jiffy pots or Cow Pots. Ours molded. This year, we're using what the vendors at the Farmer's Market call "six packs."
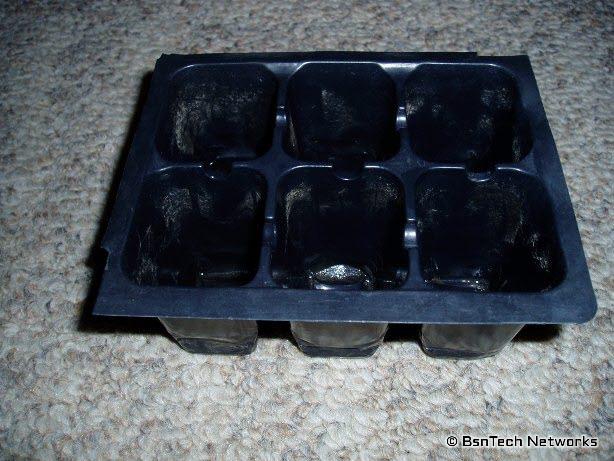
We'll fill each cell with seed-starting mix and water it throughly. You don't want to water after you put the seeds in, otherwise you could wash them to the sides of the cell. Put 2-3 seeds on top of the wet soil, and crumble more soil loosely on top. Put the cover on the flat (ours came with a plastic cover) and cover that with a blanket. This keeps heat in and light out, you don't want light before germination. Water the cells gently daily with a spray bottle.
When you see the first "elbow" of a seedling come through the soil, remove the cover and expose the seedlings to light. We use a shop light with a cool white bulb that's suspended on chains from the ceiling so we can move it up and down. You want the light right above the seedlings at all times, you don't want them to have to reach for the light. Reduce watering to every other day or every 3 days. Overwatering is just as bad as underwatering. If any of the seedlings get tall and skinny (called looking "leggy"), look like they're pinched at the bottom, and flop over, this is damping off disease. Discard those plants, water less frequently, move the light closer, and increase air circulation. You could use a small fan for that.
The first set of leaves will be "seed leaves," meaning they don't look like the parent plant, they're just kind of generic. Once you get your second set of "true leaves", meaning they will look like the leaves you would recognize, add dilluted liquid fertilizer (the bottle should have instructions for seedlings) once a week. In a week or two, you'll see which seedling in each cell is the healthiest. Clip the weak seedlings at ground level (do not pull, you'll disturb the roots of your "winner" seedling) and discard. Continue watering and fertilizing.
In a few weeks, the plants will start to outgrow their cells. Transplant them into bigger pots. We save yogurt tubs throughout the year for this purpose. Continue watering and fertilizing.
A little over a week from your intended plant-outside-date, you'll have to harden them off. This entails putting the transplants outside in a protected spot (we put them in the inner corner of the deck) for an hour, then a little longer the next day, etc... etc.. until they're used to being outside. Then you plant!
Re: How we start seeds
Fitness Blog :: Food Blog
Thanks for this; I will refer to it when I start my seeds!
My Clean Eating Blog
Green Living Reading List